
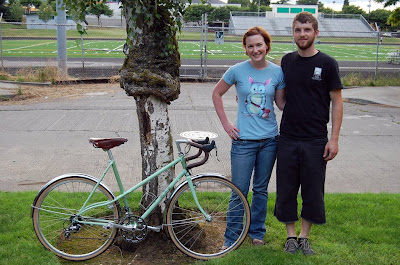
Finally got around to building up Alex's bike. This kind of build can test the patience, with fenders, rack, lighting all having to work together. It's a delicate balance and I cannot express how important the pre-paint mock build-up is for dialing it all in. It's rewarding to see this kind of bike when it's done, having started as a sketch on a piece of paper. Hopefully the bike lives up to the idea that inspired it.
12.07.2008

10.04.2008
Alex B.
Alex's bike is just about done. A few braze-ons and it will be ready for the painter. The last few days I've been working on the custom front rack that will be used daily with low-rider panniers, but with an upper platform for odd loads or even a handlebar bag. This should be a really versatile rack, and being designed as an integral part of the front end geometry, it will be comfortable and steer predictably loaded or not. I'm really excited to get this bike painted and built. Next will be a mixte for Heidi with a custom rear rack.

9.28.2008
Currently...
Plugging away at Alex's commuter and it's shaping up nicely. Getting ready for the Oregon Manifest show Oct. 10-12 which should be quite a production. This photo shows the stays blended into the seatlug - a look I really like. If you're in Portland the weekend of the show make sure to come by my booth and say hello. Next week I'll be working on bridges and braze-ons and a custom rack for Alex's bike.

9.20.2008
Metallurgy
Just out of the soak tank, wish I could preserve it in this state. So much better than paint. With the main triangle complete now it's onto lug thinning and the rear triangle.

9.07.2008
Fresh start
It's been a while since I've posed anything here. If you've checked my flicker photostream then you know I've been keeping busy, but I have definitely been slacking when it comes to documenting build processes, which is why I started this blog. So, I thought I'd make a fresh start and try to document the bike I just started. Alex wanted hand carved lugs and pretty much gave me free reign with the look. These started off as Pacenti lugs and the final shape is very simple, reminicent of the shapes of a prominent french builder but...well, different. I feel like I've taken what I like about the original shape and made it my own, have a look:


7.05.2008
A happy customer...
Natalie got a her new bike today and seems pretty happy about it. I'm pretty happy with how it turned out. Next up is a fillet-brazed 650B gravel road bike with disk brakes, Alfine group, saddlebag, and twin-plate fork crown.

5.28.2008
new site
It's been a long time coming, but last night www.mapbicycles.com finally went from being a static placeholder to a bona fide website. There will be a lot added in the way of new bikes as time goes on, but there is a lot of information there now about what I do. Check it out and tell me what you think.


5.18.2008
slowly...
In between projects I like to give myself a few days to work on the stainless lugged touring bike I've slowly been building myself. Over the last few days I've built the fork and started the bridges and braze-ons. It's finally resembling something that can be ridden which would normally mean the end is near. In this case I still have a good bit of work in the racks which I'm really excited about. A combination front platform/low rider rack with custom handlebar bag by Eli of Lemolo, and light rear rack for small panniers or saddlebag support. The racks will be nickel plated as well which will be a nice touch but sure does add to the work. Exciting stuff.


5.11.2008
finger wave
I've always had a fascination with mixte frames. I remember the first time I looked seriously at a twin lateral design and how impressed I was with it even though the frame I was looking at wasn't much to speak of. There are surprisingly few custom mixte designs on the road.
This mixte is very traditional aside from the curved stays and their attachment at the rear of the frame. It solves a problem common to mixte designs involving chain clearance around the extra set of stays. I like the look of it as well. Reminds me of the finger wave hairstyles women wore in the 20's and 30' s. A lot of inspiration came from a mixte built for last year's Cirque du Cyclisme by J.P. Weigle and a Charrel mixte in the Golden Age of Handbuilt Bicycles.


This mixte is very traditional aside from the curved stays and their attachment at the rear of the frame. It solves a problem common to mixte designs involving chain clearance around the extra set of stays. I like the look of it as well. Reminds me of the finger wave hairstyles women wore in the 20's and 30' s. A lot of inspiration came from a mixte built for last year's Cirque du Cyclisme by J.P. Weigle and a Charrel mixte in the Golden Age of Handbuilt Bicycles.


5.03.2008
The marathon continues.
I've lost track, but it has been a non-stop 7 day week for me since late 2007. Don't get me wrong, no one is forcing me to do it, but lets just say my shop pants are looking pretty ragged lately, as are my hands. I'm really happy with the work that is getting done though. It makes all the time spent in the shop worth it. Here's a picture of my latest bike. It is a 50 cm mixte set up to be a capable touring bike when the need arises. I'm in the process of finishing the rear triangle and today made the curvy stays which you can see in the photo. I think they add some nice lines to an otherwise very traditional design. After this it will be bridges and braze-ons and then off to paint.
I'm looking forward to a 2 week trip to Virginia in the beginning of June to the Cirque du Cyclisme and then some bike touring around New England. I'll certainly be ready for it by then.

I'm looking forward to a 2 week trip to Virginia in the beginning of June to the Cirque du Cyclisme and then some bike touring around New England. I'll certainly be ready for it by then.
4.10.2008
Nickel-plated rack


Here's the porteur rack for Ian's bike after the plating. It took a bit of elbow grease to finish the rack to a point where plating was possible, and a bit more to buff out the dull nickel after it was done. All in all I'm very pleased with the results and anxious to see it put to task. Oh, and below is the before photo - quite a transformation:

3.25.2008
My, what a busy week...
I've been working a lot lately, and on a lot of different things that I really want to see get done. If I had the choice I'd just work on one project till completion, but I've had to learn to just dive into certain things just to build up some momentum, spend time where I can, and be ready to switch gears at a moments notice. Just when it starts to feel like you're bogging down in the muck, you get a nice surprise like finished headbadges and a bike back from the painter! Here are a few things that stuck out in the last week:
Headbadges came back from laser engraving. After having the badges laser cut out of stainless steel, I gave some of them a satin finish and the others I polished and had the MAP name laser engraved by Joe at Engraveyourtech
I like the brushed badges the most.

Track bike came back from the painter with the new graphics. I can't wait to see this all built up and going round and round Alpenrose track this spring. Drew is a strong rider so I wouldn't be surprised to see the bike in some top finishes.

Been enjoying making my own seatstay caps. Simple, yet very pleasing touch at least from my perspective as the builder since the shape is totally in my hands. Plus, they make for super light seatstays in comparison to using those bulky plug-style caps

Starting on another mixte shortly which is really exciting. I'll be posting pictures as soon as it starts taking shape.
3.14.2008
Porteur rack
Here is the finished rack for the porteur frameset in the previous post. The frame is off to the painter and the rack will get nickel plated here in town. The rack is a 10" x 12" platform with dual light mounts and wire routing. Very straight forward and functional design that should get many many years of use, especially considering the durability of a nickel plated finish.


3.02.2008
Ian S. porteur
I wish this was my bike.
I still have to build the rack, but the majority of the work is done. The build on this bike should be really interesting as well, with mostly nos classic components. Here are a few details I like about this bike:
I still have to build the rack, but the majority of the work is done. The build on this bike should be really interesting as well, with mostly nos classic components. Here are a few details I like about this bike:
- Cable stop off binder bolt: I've done this a few times now and I really like how it works and how clean it makes the cable routing.


- Modified Pacenti fork crown: This is a great crown, but it's not offered without a caliper brake hole. I filled the hole with brass and filed the area smooth and then brazed on a plate into the underside of the steer tube which has a threaded hole for the fender mount. Clean fender mounting is a must.


2.22.2008
Variety

As I've been taking on more projects, the question as to what I will and what I won't do has presented itself more seriously. As much as I appreciate variety, and it is true that variety is the spice of life, sometimes you need to reel it in and focus. There are so many things about bikes you begin to appreciate once you start making them, and so many things you feel you need to try, but in framebuilding as in many other things, repetition is key. I'm making a point of limiting my scope as a builder in these formative years of mine, and mastering those things first which are essential, and then taking on only those challenges I feel are worthy of repetition. Slowly, the list is growing.
Making my own seatstay caps is on the list.
2.05.2008
A step in the right direction.
It's taken a while, but I'm finally getting to the point where I'm refining some of the frame graphics I've been working with. This is a big step in the right direction in terms of professionalism, but I've put it on the back burner until recently mainly because it has nothing to do with building a good frame. Still, I realize its importance and so far I really like the results. The track bike I built last month will be the first bike to get the new headbadge and new downtube graphics.
Here's the headbadge:
 These are made of stainless steel and some will have a mirror polish and others a more matte brushed finish, depending on what the customer thinks best suits the frame. The picture shows how I receive the badges from the laser-cutter. I am also having 'MAP' laser-engraved below the fleur de lis which should give the badges a finished look.
The other improvement is in the downtube logo.
Here it is without color, and as it's meant to wrap around a tube, its twin image is above it.

What I like about it most is its versatility in the ways it can be utilized. The inside of the globe can be one color and the text another contrasting color. Or for a more subtle look, the color of the frame can show through the lines of the globe while only the text is a contrasting color.
Can't wait to see some variations.
Here's the headbadge:
 These are made of stainless steel and some will have a mirror polish and others a more matte brushed finish, depending on what the customer thinks best suits the frame. The picture shows how I receive the badges from the laser-cutter. I am also having 'MAP' laser-engraved below the fleur de lis which should give the badges a finished look.
The other improvement is in the downtube logo.
Here it is without color, and as it's meant to wrap around a tube, its twin image is above it.
What I like about it most is its versatility in the ways it can be utilized. The inside of the globe can be one color and the text another contrasting color. Or for a more subtle look, the color of the frame can show through the lines of the globe while only the text is a contrasting color.
Can't wait to see some variations.
2.03.2008
Not the spoon, but the fork.
I'm really enjoying building this frame. There are going to be some really classy details in the build, so I'm taking the opportunity to really make this a special bike. It's going to be a city bike with fenders, front platform rack and integrated lighting. So far, I've carved the lugs, mitered the tubeset and today I finished the fork.

1.27.2008
Lugs are work
Ask any of the old masters what's missing from the new wave of young framebuilders and many will say: patience for hand-carving lugs. Investment cast lugs are so common now and the quality of those castings so high, that many very beautiful shapes and finishes are possible without the slightest alteration to some of these lugs.
It makes sense: lug carving is hard work, and very time consuming. I'm learning this. Plus, it's not really necessary considering the quality and selection of the investment cast lugs that are available. That being said, I think it's fine that many builders don't spend much time handcarving lugs. For someone new at it like me it can almost double the time it takes to build a frame, and from a business perspective this doesn't make much sense unless you can charge appropriately. There are plenty of other fish to fry. Construction method, good brazing, fit, alignment are all no doubt more important to the overall function of your bike. Plus, when someone is clearly more impressed with your shiny laser-cut headbage than your handcarved lug, we need to ask ourselves - can we blame them? These are the times we live in.
Still, I feel like the old guys have a point. Putting the thought and time in to handcarve your lugs shows how much you love it. It's that simple. It's the kind of thing that can tickle your fancy after 25 years of building. These different shapes have become the signatures for a whole generation of builders that came before me, and many of them have built their careers on these amazing shapes.
I guess my point is, if it's not lugs it needs to be something else. Something the BUILDER does. A construction method, an aesthetic, a utility, a level of finish, something that shows where your affinity to the bicycle lies. A signature is required.
1.13.2008
Here's my latest project, a straight-up no-nonsense track bike built for velodrome use. I've got my fingers crossed that the owner will be taking the podium more than once this coming track season.
It's very traditional with the only exception being the integrated binder bolt in the fastback seatstays:

Makes for a very svelte seatcluster

Should look nice in pearl white with blue and burnt-orange decals and a stainless headbadge:

It's very traditional with the only exception being the integrated binder bolt in the fastback seatstays:

Makes for a very svelte seatcluster

Should look nice in pearl white with blue and burnt-orange decals and a stainless headbadge:

Newvex touring
I'm pacing myself on this one...
This bike is going to be a touring rig outfitted with a full accompaniment of front and rear racks, dynamo lighting, internal cable routing, braze-on slap guard, and maybe even a handmade quill stem - we'll see. I'm hoping to have a Eli of Lemolo Bags http://lemolobags.wordpress.com/
design a sort-of-handlebar bag but without the need for a decalleur. I'm gonna roll with 650B wheels and Campagnolo 10 speeds drivetrain.
But, for now here's the front triangle post-braze and before too serious polishing.


Subscribe to:
Posts (Atom)